使用宝塔面板安装 xray+tcp+xtls最强科学上网方法
本期视频地址: https://youtu.be/SEEb5vblb9w
准备工具
1、VPS 一台,重置好主流的操作系统
推荐用centos7系统
2、域名一个,解析到该VPS。
以下操作使用centos7演示
一、更新系统
CentOS
1 | yum install epel-release -y |
二、安装宝塔面板
宝塔面板主页:https://www.bt.cn/
Centos安装命令:
1 | yum install -y wget && wget -O install.sh http://download.bt.cn/install/install_6.0.sh && sh install.sh |
复制代码
试验性Centos/Ubuntu/Debian安装命令 独立运行环境(py3.7) 可能存在少量兼容性问题 不断优化中
1 | curl -sSO http://download.bt.cn/install/install_panel.sh && bash install_panel.sh |
复制代码
Ubuntu/Deepin安装命令:
1 | wget -O install.sh http://download.bt.cn/install/install-ubuntu_6.0.sh && sudo bash install.sh |
复制代码
Debian安装命令:
1 | wget -O install.sh http://download.bt.cn/install/install-ubuntu_6.0.sh && bash install.sh |
复制代码
安装完毕之后,不要着急打开
输入以下命令:
1 | sed -i "s|bind_user == 'True'|bind_user == 'XXXX'|" /www/server/panel/BTPanel/static/js/index.js |
三、安装xray
1 | bash -c "$(curl -L https://github.com/XTLS/Xray-install/raw/main/install-release.sh)" @ install -u root |
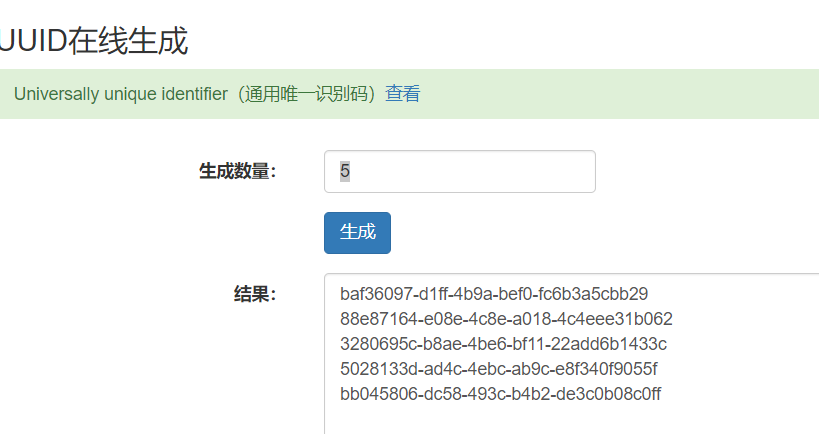
生成UUID有两种方法
1.直接在shell输入命令
1 | cat /proc/sys/kernel/random/uuid |
- 使用该网站生成 https://1024tools.com/uuid
安装完毕以后,在VPS目录 /usr/local/etc/xray 找到 config,json 文件,贴入下面的配置文件
(以下配置中,两处修改 其中域名处,必须修改)
1 | { |
三 修改网站配置文件
首先在代码第一行插入如下代码(强制开启 HTTPS 访问)
1 | server { |
其次删除 listen 80; 这行,并修改 443 端口为 37213 (以上配置文件端口),去除 ssl 字段。
1 | listen 8002 http2; |
测试 Xray 配置文件
输入下面命令,查看 Xray 是否正常运行,若是有问题,就是配置文件出错
1 | systemctl restart xray && systemctl status xray |
本博客所有文章除特别声明外,均采用 CC BY-NC-SA 4.0 许可协议。转载请注明来自 云白科技!
评论